Plugin Host Utility Email Notifications
You are able to set up the email notifications from the IntelliTrack Plugin Host Settings form. When an error occurs in the Plugin Host Exception Log or the IntelliTrack Plugin Processing Error Log, an email message will be sent to the recipient email address that you specify. The email will include information about the error or errors in the data sync.
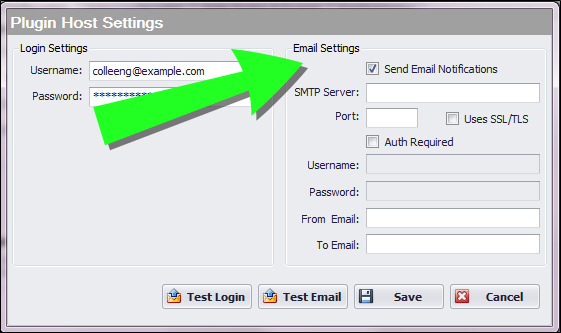
When you set up an email client for email notification, you need to provide outgoing email settings and an inbound email address. IntelliTrack Plugin Host and IntelliTrack Plugin email notifications are set up in the Plugin Host Settings form. Follow the steps below to set the outbound email settings as well as set the inbound email address (intended recipient of the notification emails) for email notifications:
- In the Email Settings portion of the IntelliTrack Plugin Host Settings form mark the Send Email Notifications checkbox.
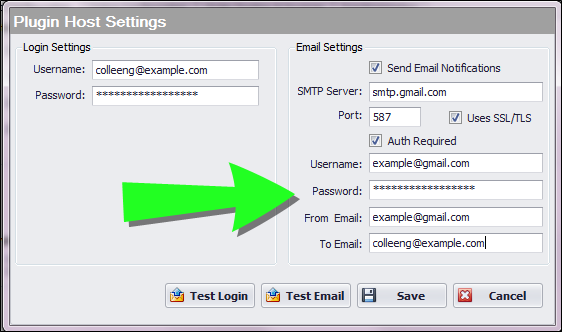
- The SMTP Server field, Port field, Uses SSL/TLS checkbox, From Email, and To Email fields activate.
- SMTP Server field: enter the SMTP server information in this field. For example, if you are using a gmail address for the email notifications, enter smtp.gmail.com in this field.
- Port field: enter the port number for outgoing mail. The default port number is 25, but it is often blocked. Other default port number options, depending on the security method, may be used.
- SSL Connection: 465 or 25025
- TLS Connection: 587 or 2525
- Uses SSL/TLS checkbox: SSL and TLS are security methods used to secure an email transfer. Mark this checkbox to secure the email transfer. Many SMTP servers require that SSL or TLS is used for email transfers. When this checkbox is marked, make sure you are using a default port number that works with your client server’s security method (SSL or TLS).
- Auth Required checkbox: mark this checkbox to require a username and password for the From Email Address. When this checkbox is marked the Username and Password fields are activated.

- Username field: activated and required when the Auth Required checkbox is marked. Enter the outbound email address (From Email) in this field.
- Password field: activated and required when the Auth Required checkbox is marked. Enter the password for the outbound email address (From Email) in this field.
- From Email field: enter the outbound email address in this field.
- To Email field: enter the recipient email (this is the inbound email address) in this field.
- Test Email button: click this button to send a test email from the outbound email address (From Email setting) to the email recipient (To Email setting).
- If the email transfer is successful, you are notified via the message status bar along the bottom of the main plugin utility screen. A test email is sent to the email recipient’s address that is entered in the To Email field.
- If the email transfer fails, check your Email Settings to ensure they are entered correctly and test the email transfer via the Test Email button again.
- Please note that a test email may fail because the email was blocked by the server settings for the inbound email address. If this is the case, you may need to review the server settings for the inbound email address so that it will allow the email transfer.
- Please note that a test email may fail because the port number is set incorrectly. In this case, the port number may need to be updated to allow the transfer. The port number depends on the security method (i.e., SSL or TLS) that your client server uses.
- If you are unable to resolve this issue, consult your network administrator and review the outbound settings. If they are set correctly and the test email transfer still fails, the issue may be related to the inbound email address.
- If you cannot resolve this issue, contact your network administrator to make sure that you have the correct email settings entered at this form for the outbound email.
- When your email settings are entered correctly, click the Save button to save your settings and exit this form.